Creating Your First List
You can create your own list of gluten-free venues using GlutenFreeMap. No technical skills are needed, although you will need a free GitHub account. This account will allow you to create a repository where your list will be stored. You can then use GlutenFreeMap to manage that list.
Steps
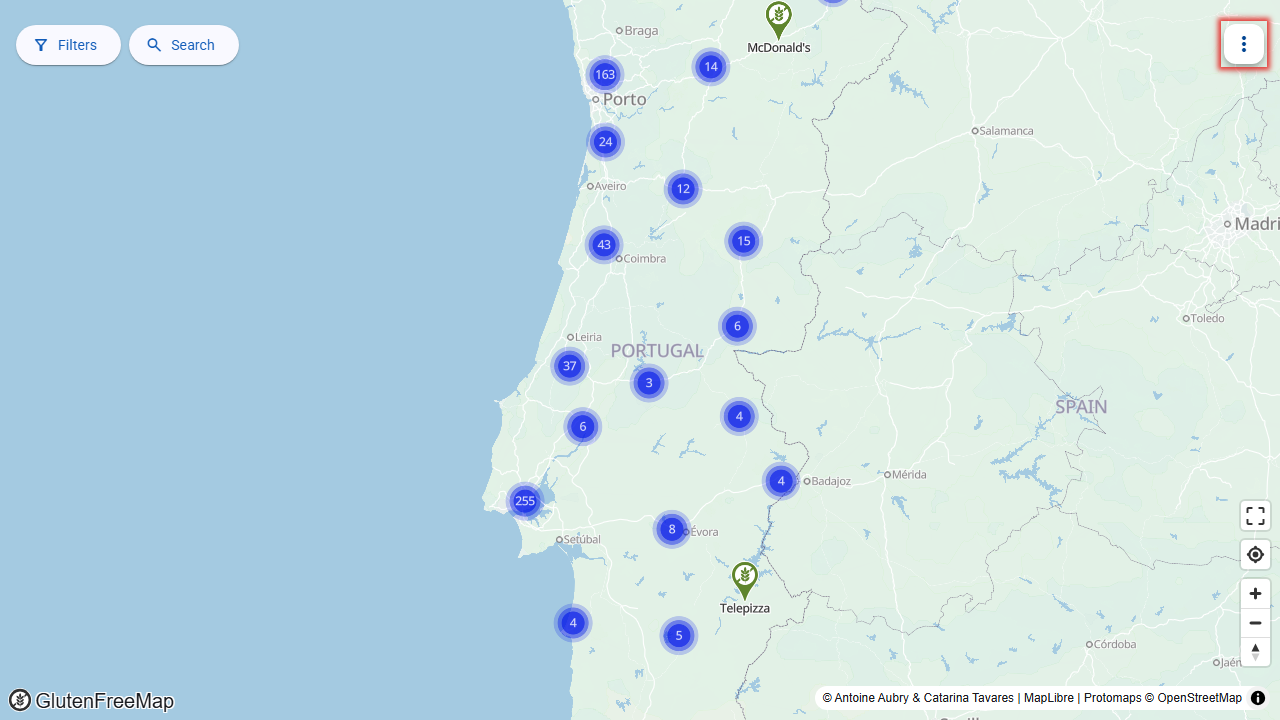
Start by opening the application's menu:
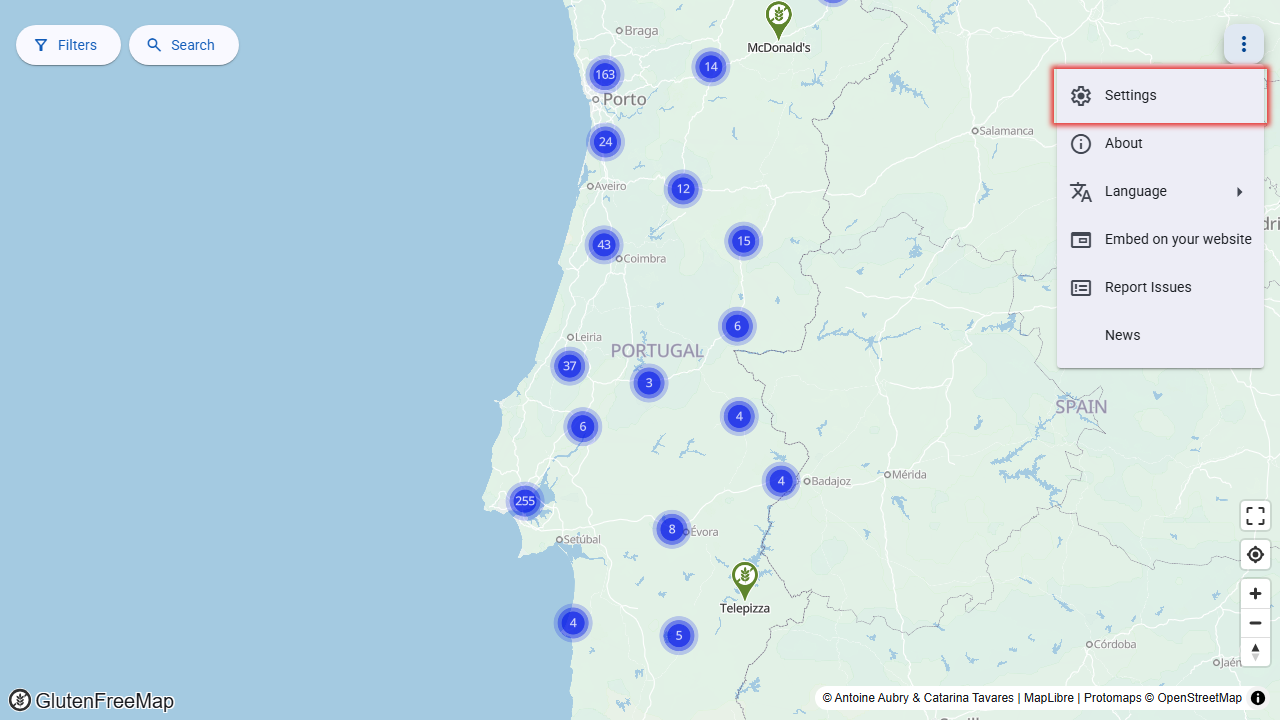
Select the "Settings" option:
Select "Add a GitHub repository":
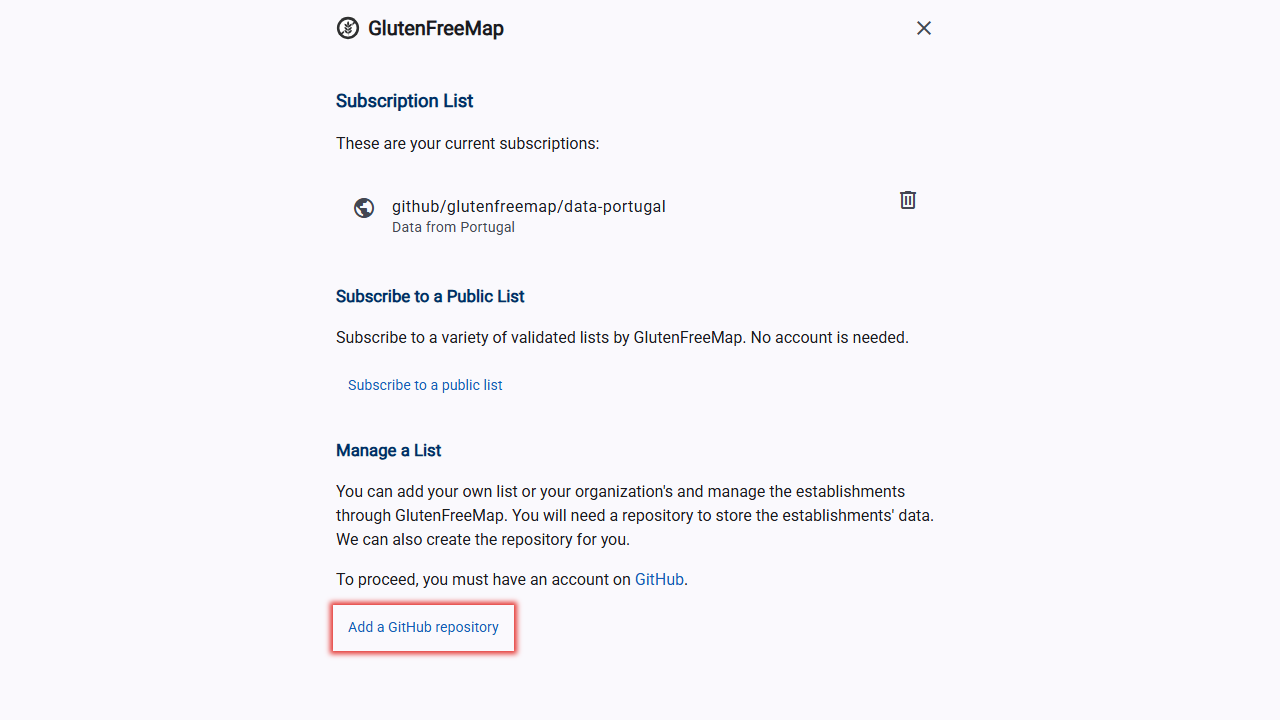
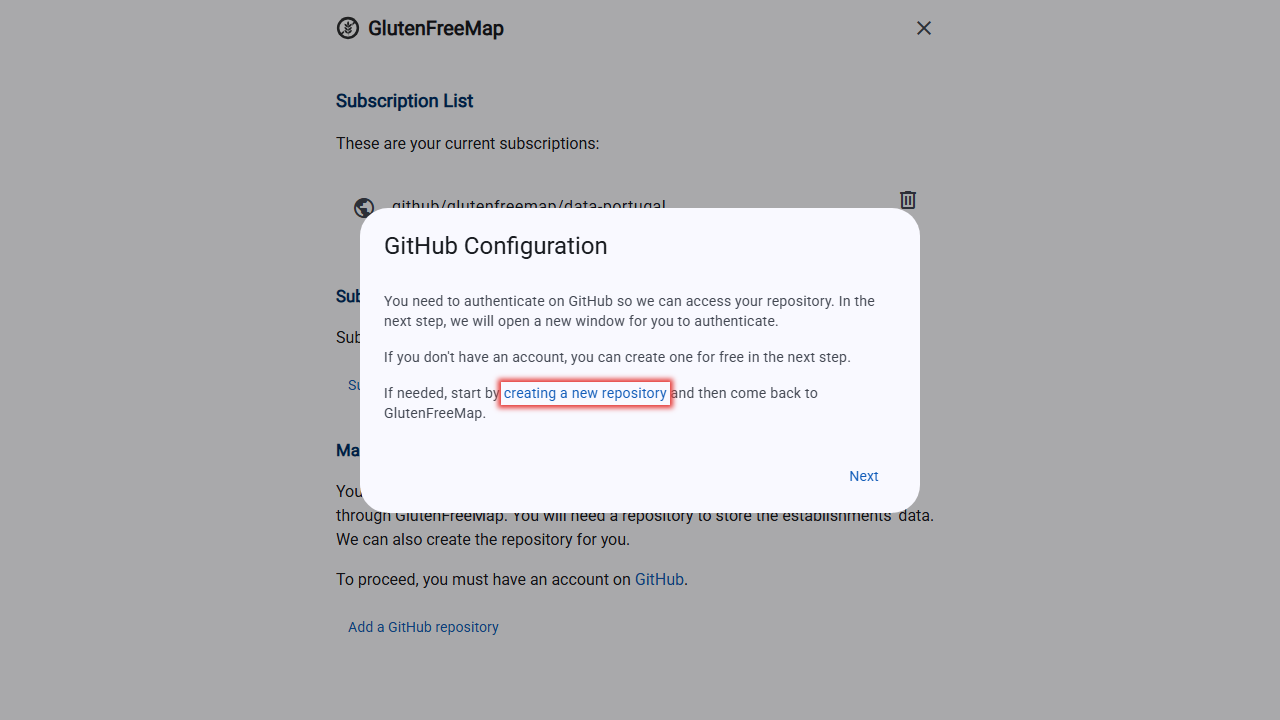
If you don't have a repository yet, select "creating a new repository" to create one:
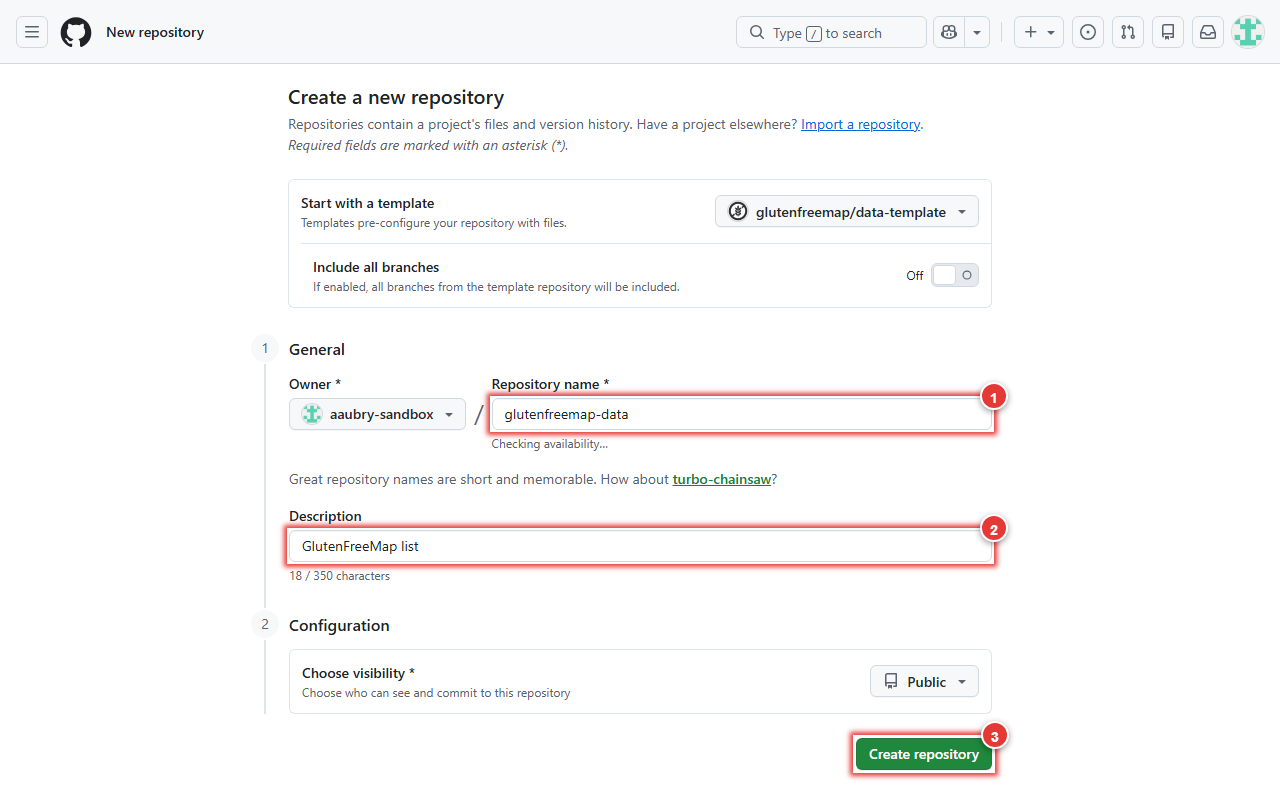
On GitHub, select a name for your repository 1 and a description 2 , then select "Create repository" 3 :
Who Owns Your List?
Your list is not stored by GlutenFreeMap. Instead, it is saved in a repository that you own (for example on GitHub). This means you have full control over your data. Only you (and people you choose) can change or remove your list. GlutenFreeMap only helps you manage and share it.
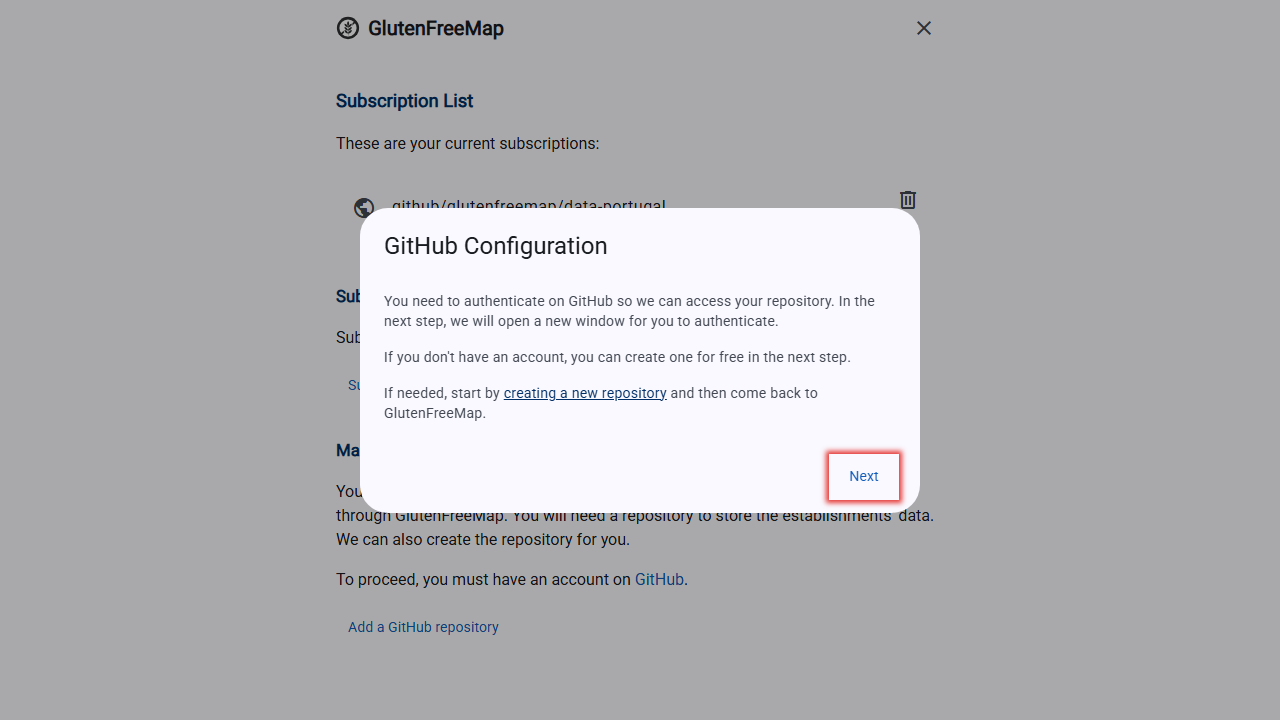
Once your repository is created, return to GlutenFreeMap and select "Next" to proceed.
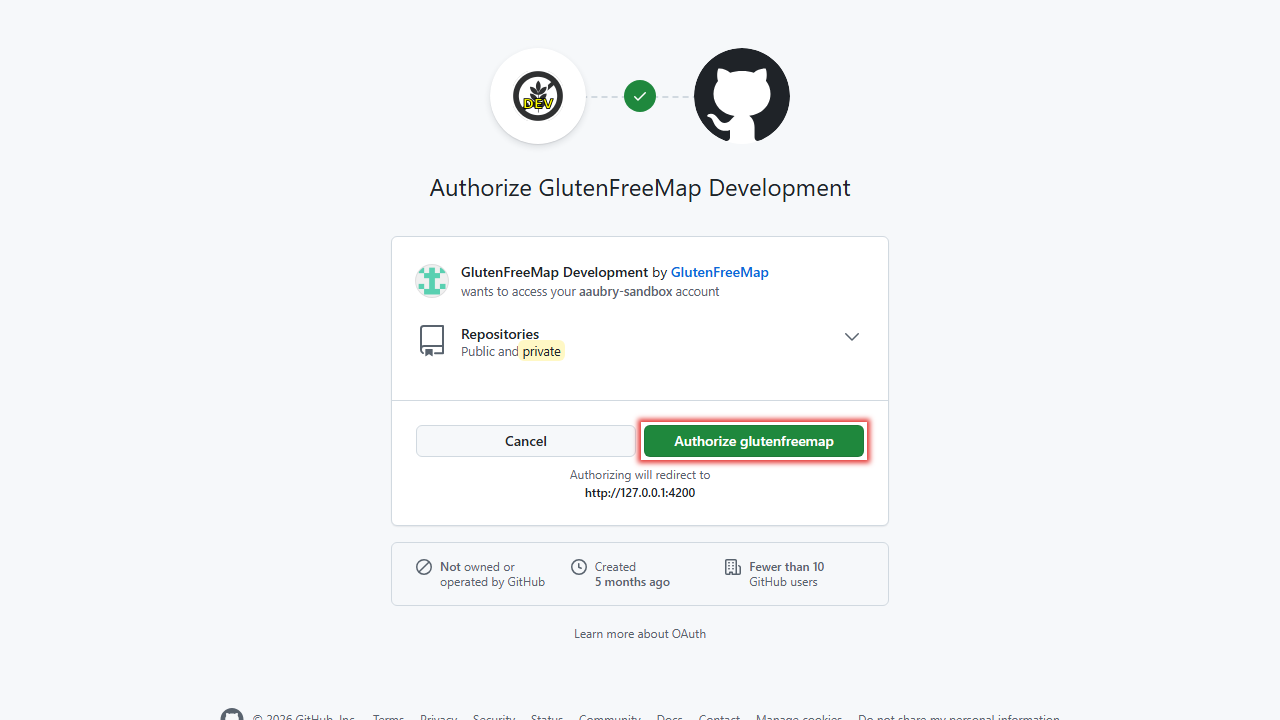
A window will open where you can authorize GlutenFreeMap to access your GitHub repositories. Confirm that you want to give access to your repositories by clicking "Authorize glutenfreemap":
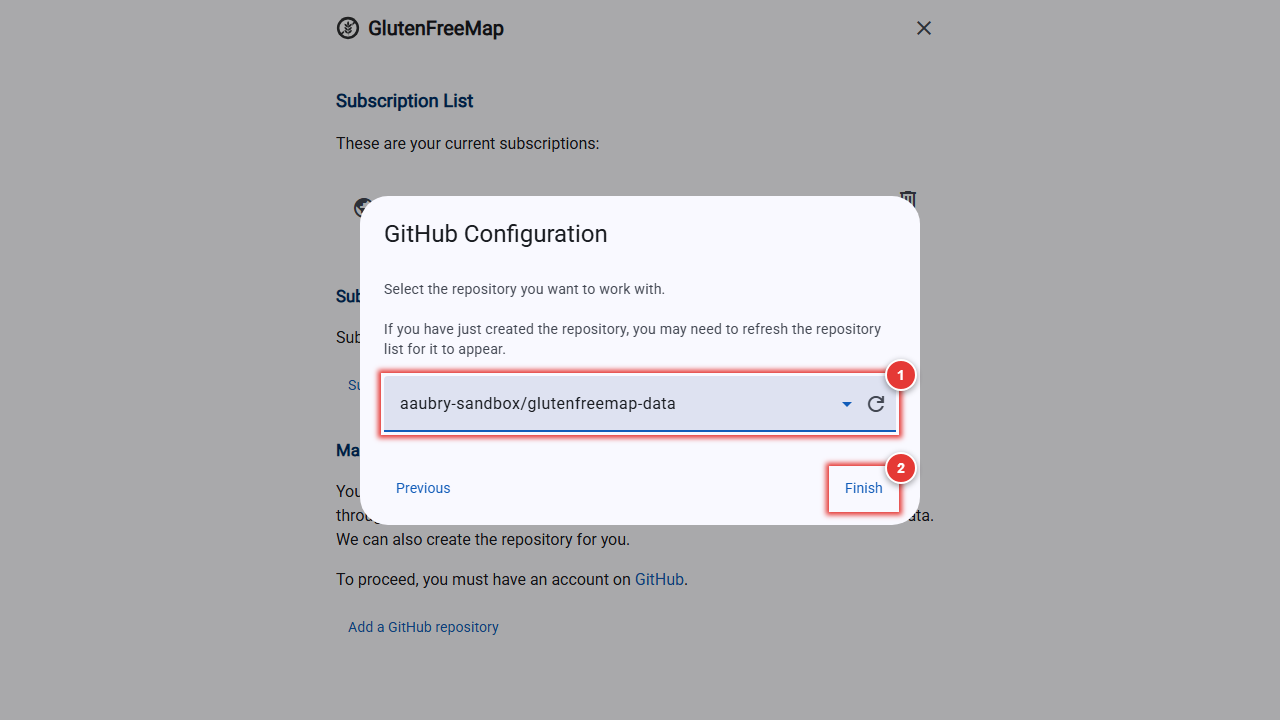
After authorizing, the window should close and you should return to the GlutenFreeMap application, where you can select the repository that you want to add. Select the repository in the list 1 , then click on "Finish" 2 :
The GitHub configuration window will close and you will return to the settings, where you will see your newly added repository 1. Press "Save" 2 to save your changes and return to the main screen.

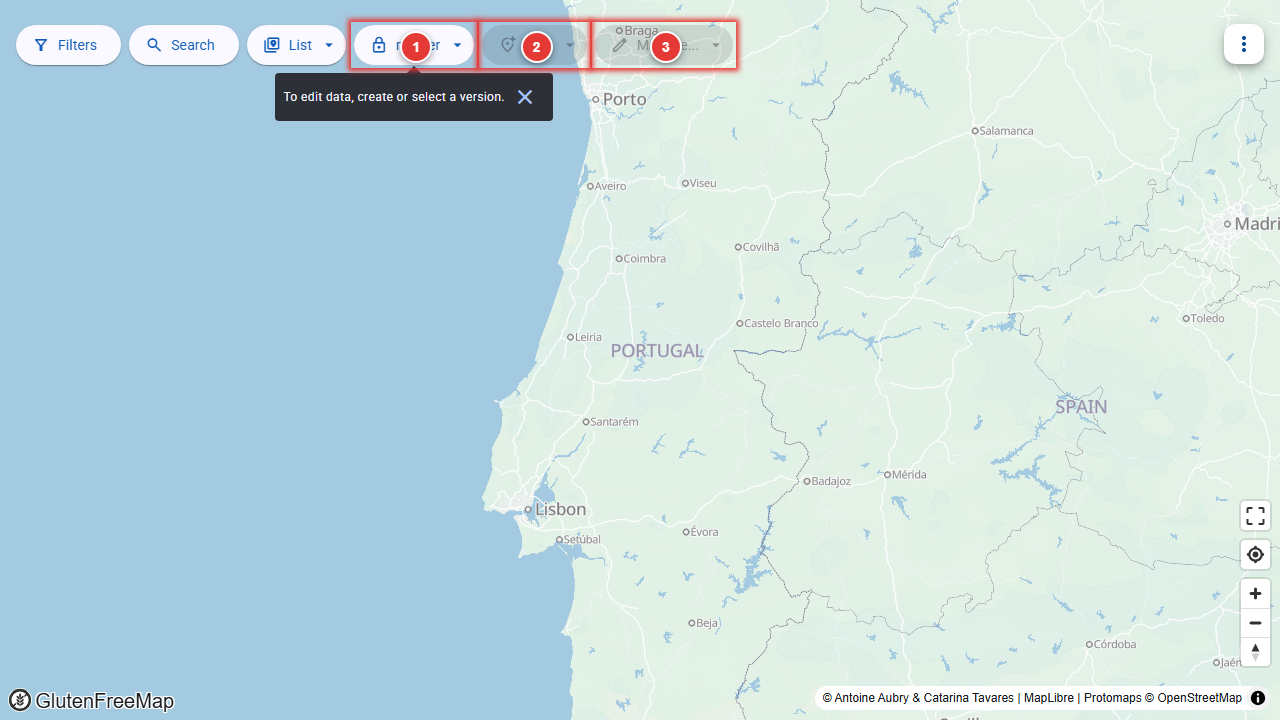
Once on the main screen, you will notice that the map contains no venues and that the interface shows additional elements 1 2 3 that will allow you to manage your list.